
Your toddler grabbed the paintbrush and immediately started painting outside the lines, or maybe abandoned the brush entirely to smear paint with their whole hand. You’re searching for fall crafts for toddlers because you want ideas that actually work with that instinct, not against it.
Here’s the direct answer. The best fall crafts for toddlers hand over real control: open-ended materials, no single correct way to place a leaf or a dab of paint, and a finished piece that looks like a toddler genuinely made it. This guide organizes 20 real crafts by material, mess level, and skill, each one built around your toddler actually doing the creating, not just watching or following a template.
You don’t need a Pinterest-perfect setup or a stack of pre-cut shapes to make this work. Most of what’s in this guide uses fall materials you’d collect on an ordinary walk, plus a few basics already in your kitchen.
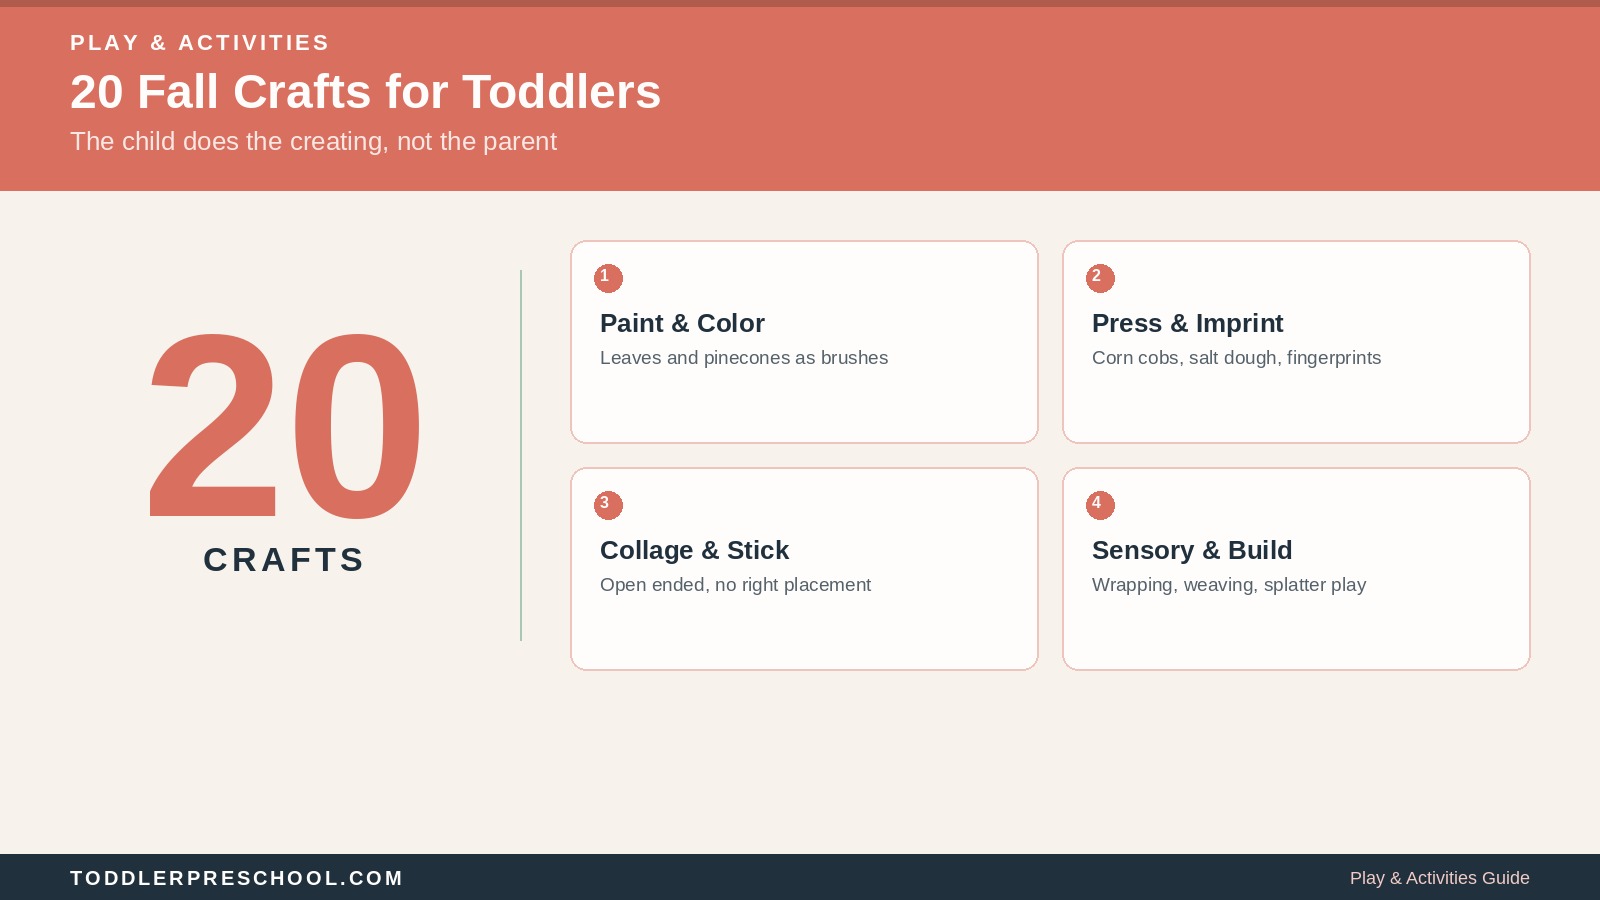
The Direct Answer: What “Child Does the Creating” Actually Means
A toddler-led craft has no single correct outcome. Your toddler chooses where the paint goes, how many leaves get glued on, and when a piece feels done.
This is different from a craft where an adult pre-cuts a shape and a toddler just glues it in the one designated spot. Both can be fun, but only one genuinely builds your toddler’s own creative decision making.
This distinction matters more than it might seem. A toddler handed a finished template to fill in learns to follow directions. A toddler handed real materials and genuine choice learns something closer to actual creative thinking, a skill that extends well beyond any single craft.
Why Process Art Matters for Fall Crafts for Toddlers
Process art, art focused on exploration rather than a fixed final result, is a real, well established approach in early childhood settings, not just a trend.
The Process Is the Point
A toddler squishing paint, gluing a leaf slightly crooked, or covering an entire page in one color is engaging fully with the material. The resulting artwork is a record of that engagement, not a test of whether it matches a template.
What This Builds Beyond the Craft Itself
Real choice within a craft builds decision making, sustained attention, and a genuine sense of ownership over the result. A toddler who made every choice themselves tends to stay engaged longer than one simply following steps.
This kind of engagement also tends to reduce the frustration that comes from a toddler’s fine motor skills not quite matching an adult’s vision for how a craft “should” turn out. Letting go of that vision entirely is often the single biggest shift a parent can make.
This Doesn’t Mean No Structure at All
Every craft in this guide still has real boundaries: specific materials, a safe process, and a clear stopping point. Structure and creative freedom aren’t opposites here.
How to Use This List of Fall Crafts for Toddlers
Every craft below uses the same shorthand so you can scan quickly.
Best fit is a loose age range, not a deadline. Toddlers vary widely in fine motor skill and attention span, and a wider range than listed is completely normal.
Time covers setup, then typical active craft time. A toddler often engages with something for less time than an adult expects, and that’s fine.
Mess is rated Low (a damp paper towel handles it), or Medium (a few minutes with a broom or sponge). No craft in this guide is rated high mess, though a few genuinely test that boundary.
Supervision describes how closely an adult needs to stay involved. Arm’s reach means active, close supervision, which matters most for anything involving small natural materials or a tool.
Skills it may support is phrased deliberately as “may,” never as a promise. A toddler doesn’t need a developmental justification to enjoy squishing paint.
A Quick Word on Safety
A few crafts below involve small natural materials like acorns or seeds. General guidance from the U.S. Consumer Product Safety Commission is worth keeping in mind: anything small enough to fit through an empty toilet paper tube, about 1.25 inches across, is a choking risk for a toddler who still mouths objects. These specific crafts need arm’s reach supervision throughout, not just during setup.
Washable paint and nontoxic glue are assumed throughout this guide. Checking the label on any craft product before handing it to a toddler is a reasonable, quick habit.
Gathering Fall Craft Materials Ahead of Time
A little advance collecting makes several of these fall crafts for toddlers available on short notice.
A Simple Collecting Basket
Keeping a basket by the door for leaves, acorns, and pinecones gathered during ordinary walks means you’ll often have materials on hand before you even plan a specific craft. Toddlers frequently enjoy the collecting itself as much as whatever craft comes after, making the gathering trip a worthwhile activity on its own.
Storing Leaves for Later Use
Flat leaves pressed between the pages of a heavy book for a few days work well for the pressing and stamping crafts in this guide, since fresh leaves can curl before you get to them. A week of pressing is usually enough, and a slightly curled leaf still works fine for the less precise crafts like leaf painting.
One Trip Covers Most of This Guide
A single walk or farmers market visit for a small pumpkin, a few pinecones, and a handful of acorns, plus pantry basics like flour and salt, covers nearly every craft in this guide. Checking your own kitchen and yard first often reveals you already have more than you’d expect.
All 20 Fall Crafts for Toddlers at a Glance
Paint and Color Exploration
| Craft | Best Fit | Mess | Time |
|---|---|---|---|
| Leaf Painting | 1.5 to 3 | Medium | 10 to 15 min |
| Pinecone Rolling Painting | 1.5 to 3 | Medium | 10 to 15 min |
| Fork-Printed Fall Tree | 2 to 3.5 | Medium | 15 to 20 min |
| Fall Color Mixing Exploration | 1.5 to 3 | Medium | 10 to 15 min |
| Textured Sensory Paint | 1.5 to 3.5 | Medium | 15 to 20 min |
Press and Imprint
| Craft | Best Fit | Mess | Time |
|---|---|---|---|
| Corn Cob Printing | 2 to 3.5 | Medium | 10 to 15 min |
| Leaf Silhouette Sponge Art | 2 to 3.5 | Medium | 15 to 20 min |
| Salt Dough Leaf Imprints | 2 to 3.5 | Low | 15 to 20 min |
| Playdough Nature Stamping | 1.5 to 3.5 | Low | 10 to 15 min |
| Fingerpaint Fall Tree | 1.5 to 3 | Medium | 15 to 20 min |
Paint and Color Exploration Crafts
These fall crafts for toddlers use natural objects as the actual painting tool, not just the subject of the painting.
1. Leaf Painting
Dip a real leaf in paint and use it to paint, instead of a brush.
Best fit: 1.5 to 3 years. Time: 5 minutes setup, 10 to 15 minutes play. Mess: Medium. Supervision: Same room.
Materials and substitutions: A few sturdy leaves with a stem to hold, washable paint in a shallow dish, and paper. A large flat leaf works better than a small delicate one.
Steps: Dip the leaf into paint. Let your toddler drag, dab, or press it onto paper however they choose. Offer a fresh leaf as needed.
Skills it may support: whole hand grip, cause and effect exploration, open ended color mixing.
Easier version: Tape the leaf stem to a craft stick for an easier grip. Extension: Try leaves of different sizes and shapes and compare the marks. Stopping point: A single page of marks is a complete piece.
Visual direction: Close up of a toddler’s hand dragging a paint dipped leaf across paper, visible leaf texture in the paint trail, bright natural light.
2. Pinecone Rolling Painting
Dip a pinecone in paint and roll it across paper inside a shallow box.
Best fit: 1.5 to 3 years. Time: 5 minutes setup, 10 to 15 minutes play. Mess: Medium. Supervision: Same room.
Materials and substitutions: A pinecone, a shallow box or tray, paper cut to fit the tray, and washable paint. A small ball works as a substitute if pinecones aren’t available.
Steps: Place paper inside the tray. Dip the pinecone in paint and set it on the paper. Let your toddler tilt and shake the tray to roll it around.
Skills it may support: gross motor tilting and shaking, cause and effect, whole body engagement.
Easier version: Use a larger, easier to control tray for a younger toddler. Extension: Add a second color partway through for a layered effect. Stopping point: When the paper is sufficiently covered, that’s a complete piece.
Visual direction: Overhead shot of a paint covered pinecone mid roll inside a shallow tray, colorful trail visible, small hands gripping the tray edges.
3. Fork-Printed Fall Tree
Draw a simple tree trunk, then use the back of a fork dipped in paint to print leaf clusters.
Best fit: 2 to 3.5 years. Time: 5 minutes setup, 15 to 20 minutes play. Mess: Medium. Supervision: Same room.
Materials and substitutions: A pre-drawn or printed tree trunk, a plastic fork, and washable paint in fall colors.
Steps: Dip the back of the fork into paint. Press it onto the branches to leave a textured print. Repeat with different colors as your toddler chooses.
Skills it may support: pressing motor control, color choice, an early sense of composition.
Easier version: Use a sponge instead of a fork for a simpler press motion. Extension: Add a second fruit or vegetable fork print for texture variety. Stopping point: One finished tree is a complete piece.
Visual direction: Overhead close up of a fork mid press on a paper tree’s branches, red and orange paint prints visible, small hand holding the fork.
4. Fall Color Mixing Exploration
Offer red and yellow paint side by side and let your toddler discover orange.
Best fit: 1.5 to 3 years. Time: 3 minutes setup, 10 to 15 minutes play. Mess: Medium. Supervision: Same room.
Materials and substitutions: Red and yellow washable paint in separate small cups, a brush or fingers, and paper.
Steps: Offer both colors side by side. Let your toddler paint freely and mix them on the page. Name the new color together when it appears.
Skills it may support: color observation, cause and effect, open ended experimentation.
Easier version: Offer just the two colors, no brush, for finger painting. Extension: Add white to explore lighter shades. Stopping point: A fully mixed, well explored page is a complete session.
Visual direction: Overhead shot of red and yellow paint mixing into orange on paper, small finger dragging through the color, bright clean composition.
5. Textured Sensory Paint
Mix cinnamon or fine sand into paint for a scented, textured painting experience.
Best fit: 1.5 to 3.5 years. Time: 5 minutes setup, 15 to 20 minutes play. Mess: Medium. Supervision: Same room.
Materials and substitutions: Washable paint, a small amount of cinnamon or fine sand mixed in, and paper.
Steps: Mix a small amount of cinnamon or sand into a cup of paint. Offer it alongside plain paint for comparison. Let your toddler paint freely with both.
Skills it may support: sensory exploration, texture comparison, open ended creative choice.
Easier version: Use just the textured paint, skipping the comparison step. Extension: Let the painting dry and revisit the texture with a gentle touch the next day. Stopping point: One textured page is a complete session.
Press and Imprint Crafts
These fall crafts for toddlers use pressing and stamping motions, a natural fit for developing hand strength.
6. Corn Cob Printing
Roll or press a dried corn cob dipped in paint across paper.
Best fit: 2 to 3.5 years. Time: 5 minutes setup, 10 to 15 minutes play. Mess: Medium. Supervision: Arm’s reach, since a dried corn cob is a firm object requiring some grip control.
Materials and substitutions: A dried corn cob, washable paint in a shallow dish, and paper. A rolling pin wrapped with a paint-dipped ribbon works as a substitute.
Steps: Roll the corn cob in paint. Let your toddler press or roll it across the paper. Add fresh paint as needed.
Skills it may support: grip strength, rolling motor control, texture observation.
Easier version: Use a shorter piece of corn cob for an easier grip. Extension: Compare the print texture to a leaf or pinecone print from earlier in this guide. Stopping point: A full page of prints is a complete piece.
Visual direction: Close up of a dried corn cob covered in orange paint being rolled across paper, textured kernel pattern visible, warm light.
7. Leaf Silhouette Sponge Art
Place a real leaf on paper, sponge paint around it, then lift the leaf to reveal a silhouette.
Best fit: 2 to 3.5 years. Time: 5 minutes setup, 15 to 20 minutes play. Mess: Medium. Supervision: Same room.
Materials and substitutions: A flat leaf, a sponge or cotton ball, washable paint, and paper.
Steps: Place the leaf flat on the paper. Dab paint with a sponge around and over the edges of the leaf. Lift the leaf to reveal the silhouette underneath.
Skills it may support: dabbing motor control, cause and effect anticipation, a genuine reveal moment.
Easier version: Use a larger leaf and less precise dabbing for an easier first try. Extension: Try two overlapping leaves for a more complex silhouette. Stopping point: One revealed silhouette is a complete, satisfying piece.
Visual direction: Overhead shot of a hand lifting a leaf off paper to reveal a painted silhouette underneath, dramatic reveal moment, bright light.
8. Salt Dough Leaf Imprints
Press real leaves into rolled salt dough to capture a lasting texture imprint.
Best fit: 2 to 3.5 years. Time: 10 minutes setup, 15 to 20 minutes play. Mess: Low. Supervision: Same room.
Materials and substitutions: Salt dough (flour, salt, and water, mixed and rolled flat), and a few real leaves. Store-bought air dry clay works as a substitute.
Steps: Roll the dough flat. Let your toddler press leaves firmly into the surface. Peel the leaves away to reveal the imprint, then let the dough air dry.
Skills it may support: pressing strength, texture exploration, a lasting keepsake result.
Easier version: Pre-roll the dough and let your toddler focus just on pressing leaves in. Extension: Paint the dried imprint once it’s fully hardened. Stopping point: A few pressed leaves on one piece of dough is a complete session.
Visual direction: Close up of small hands pressing a real leaf into flattened salt dough, clear vein texture imprint visible, natural light.
9. Playdough Nature Stamping
Press acorns, pinecones, or leaves into playdough to make repeated imprints.
Best fit: 1.5 to 3.5 years. Time: 3 minutes setup, 10 to 15 minutes play. Mess: Low. Supervision: Arm’s reach, since small natural items are a choking risk for a toddler who still mouths objects.
Materials and substitutions: Playdough and a small collection of acorns, small pinecones, or sturdy leaves.
Steps: Offer the playdough flattened into a slab. Let your toddler press different nature items into the surface. Smooth the dough and repeat as many times as interest allows.
Skills it may support: pressing motor control, texture comparison, repeated cause and effect play.
Easier version: Offer just one or two nature items instead of a full collection. Extension: Try pressing the same item at different angles to compare the marks. Stopping point: When interest fades, smoothing the dough back out is a natural end.
10. Fingerpaint Fall Tree
Paint a tree trunk together, then use fingerprints to create the leaves.
Best fit: 1.5 to 3 years. Time: 5 minutes setup, 15 to 20 minutes play. Mess: Medium. Supervision: Same room.
Materials and substitutions: A pre-drawn or painted tree trunk, washable fingerpaint in fall colors, and paper.
Steps: Offer paint in a shallow dish. Let your toddler press fingertips onto the branches to create leaf prints. Add more colors as your toddler chooses.
Skills it may support: fine motor pressing, color choice, an early sense of a finished picture.
Easier version: Use a whole hand press instead of individual fingertips. Extension: Add a few real leaves glued on once the paint dries. Stopping point: A fully “leafed” tree is a complete piece.
Visual direction: Overhead close up of small fingertips pressing colorful fingerprints onto a painted tree’s branches, warm fall color palette.
Collage and Sticking Crafts
These fall crafts for toddlers focus on placement and texture, with no single correct arrangement.
11. Vertical Contact Paper Nature Collage
Tape a large sheet of contact paper to a wall and let your toddler stick nature items onto it, reaching up and out.
Best fit: 1.5 to 3.5 years. Time: 5 minutes setup, 15 to 25 minutes play. Mess: Low. Supervision: Same room.
Materials and substitutions: Clear contact paper, taped sticky side out to a wall or low window, and a basket of collected leaves, small twigs, or petals.
Steps: Tape the contact paper securely at toddler height. Offer the collected items in a basket. Let your toddler stick pieces on freely, reaching up and to the sides.
Skills it may support: shoulder and arm stability through reaching, sustained attention, open ended placement decisions.
Easier version: Lower the contact paper closer to the floor for a younger toddler. Extension: Add a second sheet the next day to compare the two finished collages. Stopping point: However full the collage gets is enough; there’s no requirement to fill every inch.
Visual direction: Wide shot of a toddler reaching up to stick a leaf onto contact paper taped to a wall, several leaves already placed, bright room light.
12. Torn Paper Leaf Collage
Tear colored paper into small pieces and glue them inside a large leaf outline.
Best fit: 1.5 to 3.5 years. Time: 3 minutes setup, 15 to 20 minutes play. Mess: Low. Supervision: Same room.
Materials and substitutions: Red, orange, or yellow construction paper, a large leaf shape drawn or printed on paper, and a glue stick.
Steps: Tear paper into small pieces together. Spread glue inside the leaf outline. Press torn pieces onto the glue until the shape is filled.
Skills it may support: fine motor tearing strength, hand eye coordination, filling a defined space.
Easier version: Pre-tear a starter pile of pieces if tearing itself feels frustrating today. Extension: Add a second, smaller leaf outline for a two-piece set. Stopping point: One filled leaf outline is a complete, displayable piece.
13. Acorn Cap Gluing
Glue collected acorn caps freely onto paper to create an open ended texture piece.
Best fit: 2 to 3.5 years. Time: 5 minutes setup, 10 to 15 minutes play. Mess: Low. Supervision: Arm’s reach, since acorn caps are a choking risk for a toddler who still mouths objects.
Materials and substitutions: A handful of collected acorn caps, paper, and glue. Small buttons work as a substitute if acorns aren’t available.
Steps: Offer the acorn caps in a small bowl. Spread a little glue on the paper. Let your toddler place caps freely wherever they choose.
Skills it may support: pincer grasp practice, placement decisions, texture exploration.
Easier version: Use fewer, larger caps for an easier first grip. Extension: Arrange caps into a simple pattern together once free placement feels easy. Stopping point: However many caps get placed is a complete piece.
Visual direction: Overhead flat lay of acorn caps being glued onto paper in a scattered pattern, small hand placing one cap, warm natural light.
14. Pumpkin Seed Mosaic
Glue real or dyed pumpkin seeds onto paper in a free, open pattern.
Best fit: 2 to 3.5 years. Time: 5 minutes setup, 15 to 20 minutes play. Mess: Low. Supervision: Arm’s reach, since pumpkin seeds are a choking risk for a toddler who still mouths objects.
Materials and substitutions: Cleaned, dried pumpkin seeds (plain or dyed with food coloring), paper, and glue.
Steps: Offer seeds in a small bowl. Spread glue on the paper. Let your toddler press seeds on freely, one at a time.
Skills it may support: pincer grasp, fine motor placement, sustained focus on a repetitive task.
Easier version: Offer fewer seeds and a smaller paper area to fill. Extension: Dye seeds different colors ahead of time for a more colorful mosaic. Stopping point: A partially or fully covered page is equally complete.
15. Crumpled Tissue Paper Pumpkin
Crumple orange tissue paper and glue the pieces inside a pumpkin outline.
Best fit: 1.5 to 3 years. Time: 3 minutes setup, 15 to 20 minutes play. Mess: Low. Supervision: Same room.
Materials and substitutions: Orange tissue paper torn into squares, a pumpkin shape drawn or printed on paper, and a glue stick.
Steps: Show your toddler how to crumple a tissue square into a small ball. Spread glue inside the pumpkin outline. Press crumpled pieces onto the glue until filled.
Skills it may support: whole hand crumpling strength, texture contrast, filling a defined space.
Easier version: Pre-crumple a pile of tissue balls if the crumpling motion itself is tricky today. Extension: Add a green tissue stem and leaf once the pumpkin body is filled. Stopping point: A fully or partially filled pumpkin is a complete piece.
Visual direction: Overhead shot of a pumpkin outline partially filled with crumpled orange tissue paper, small hand placing a piece, bright colorful background.
Sensory, Build, and Discover Crafts
These fall crafts for toddlers add movement, wrapping, or a genuine surprise element.
16. Pumpkin Yarn Wrapping
Wrap yarn freely around a small pumpkin or gourd.
Best fit: 2 to 3.5 years. Time: 3 minutes setup, 15 to 20 minutes play. Mess: Low. Supervision: Arm’s reach, since yarn presents a wrapping hazard and needs supervision around a toddler’s neck.
Materials and substitutions: A small pumpkin or gourd and a ball of yarn or thick string.
Steps: Tape or tuck the yarn end to start. Let your toddler wrap the yarn around the pumpkin however they choose. Tuck the end in to finish.
Skills it may support: bilateral hand coordination, sustained attention, an early wrapping motor pattern.
Easier version: Start the wrapping for your toddler and let them continue from there. Extension: Use two yarn colors for a more textured result. Stopping point: However much yarn gets wrapped on is a complete piece.
17. Paper Bag Scarecrow
Stuff and decorate a paper bag freely to create a simple scarecrow shape.
Best fit: 1.5 to 3.5 years. Time: 5 minutes setup, 15 to 25 minutes play. Mess: Low. Supervision: Same room.
Materials and substitutions: A paper lunch bag, crumpled newspaper for stuffing, and fall colored markers, crayons, or paper scraps for decorating.
Steps: Let your toddler stuff crumpled paper into the bag. Tie or fold the top closed together. Decorate the outside freely with markers or glued scraps.
Skills it may support: whole hand stuffing and crumpling, decorating choices, a genuine 3D craft result.
Easier version: Pre-stuff the bag and let your toddler focus just on decorating. Extension: Add yarn hair or fabric scrap clothing for more texture. Stopping point: A stuffed, decorated bag is a complete project.
Visual direction: Close up of small hands stuffing crumpled newspaper into a paper bag, colorful markers nearby, warm indoor light.
18. Nature Weaving
Weave leaves, grass, or thin twigs through a simple paper plate loom.
Best fit: 2.5 to 3.5 years. Time: 10 minutes setup, 15 to 25 minutes play. Mess: Low. Supervision: Same room.
Materials and substitutions: A paper plate with slits cut around the edge by an adult, and a collection of long grass, thin twigs, or leaves.
Steps: Show your toddler how to tuck one piece through a slit. Let them continue weaving items through in their own order. Stop whenever interest fades.
Skills it may support: bilateral hand coordination, an early over-under weaving concept, sustained fine motor effort.
Easier version: Use pre-cut ribbon strips instead of natural materials for an easier grip and texture. Extension: Try weaving a second plate with different materials to compare. Stopping point: However many pieces get woven in is a complete piece.
19. Pumpkin Splatter Painting
Drop a paint-dipped small pumpkin or ball into a lined box and gently shake to splatter paint.
Best fit: 2 to 3.5 years. Time: 5 minutes setup, 10 to 15 minutes play. Mess: Medium. Supervision: Arm’s reach, since this involves active shaking and paint.
Materials and substitutions: A small pumpkin or a ball, a box lined with paper, and washable paint in a shallow dish.
Steps: Dip the pumpkin or ball in paint. Place it in the lined box. Let your toddler tilt and shake the box to create a splatter pattern.
Skills it may support: gross motor shaking and tilting, cause and effect, whole body engagement.
Easier version: Use a lighter ball for an easier shake. Extension: Add a second paint color partway through. Stopping point: A well splattered page is a complete, satisfying piece.
Visual direction: Overhead action shot of a paint covered small pumpkin mid bounce inside a paper lined box, colorful splatter pattern visible, dynamic motion.
20. Nature Rake Painting
Drag a small rake, comb, or fork through thick paint spread on paper for a textured effect.
Best fit: 2 to 3.5 years. Time: 5 minutes setup, 10 to 15 minutes play. Mess: Medium. Supervision: Same room.
Materials and substitutions: A small toy rake, a wide-tooth comb, or a fork, and thick washable paint spread on paper.
Steps: Spread a layer of paint onto the paper. Let your toddler drag the rake or comb through it in any direction. Repeat with fresh paint as needed.
Skills it may support: whole arm dragging motor control, texture creation, cause and effect observation.
Easier version: Use a wider-toothed tool for a bolder, easier-to-see effect. Extension: Try dragging in different directions to compare the resulting patterns. Stopping point: One fully raked page is a complete piece.
Visual direction: Close up of a small rake tool dragging through thick orange and red paint, visible ridged texture pattern, bright overhead light.
Setting Up for Genuine Toddler-Led Crafting
A few practical habits make it easier to actually let your toddler lead, rather than stepping in to fix or redirect.
Prepping Materials, Not the Outcome
Cutting paper to size, mixing paint colors, or pre-drawing a simple outline is reasonable prep. Deciding in advance exactly where each piece should go isn’t preparation anymore; it shifts the craft from your toddler’s project to yours.
A useful test: if your prep work determines what the finished piece looks like, it’s probably too much. If it simply makes the materials accessible and safe, it’s the right amount. This same test works well across nearly every craft in this guide, regardless of the specific materials involved.
Resisting the Urge to Fix It
A crooked leaf, an overly saturated page, or paint mixed into an unexpected color are all signs the craft is working exactly as intended. Stepping in to correct these moments, even gently, sends a quiet message that there was a right way after all.
This can feel genuinely uncomfortable for a parent used to tidier results. Naming that discomfort to yourself, rather than acting on it by adjusting your toddler’s work, gets easier with practice.
Protecting the Space, Not the Product
Covering the table, using washable materials, and dressing for mess frees you to genuinely not worry about the outcome. This matters more for toddler-led crafting than almost any other single preparation step.
Narrating Without Directing
Describing what your toddler is doing, “you’re pressing hard there,” rather than suggesting what to do next, keeps the choices genuinely theirs while still staying engaged and present.
Displaying and Keeping Finished Pieces
A few practical thoughts on what happens after a craft is done.
Displaying Without Overdoing It
A simple string with clips, or a dedicated spot on the fridge, gives a finished piece a moment of visibility without requiring an elaborate gallery system. Rotating pieces every week or two keeps the display fresh and manageable, and gives your toddler a genuine sense that their work is valued without needing a permanent shrine.
It’s Fine to Let Most Pieces Go
Most toddler art doesn’t need to become a permanent keepsake. Photographing a piece before recycling it preserves the memory without the physical clutter, and most toddlers move on from a finished piece faster than the adults around them expect. A quick photo, added to a simple digital folder by month, builds a genuinely meaningful record over a full year without a single physical box needed.
Choosing a Few to Truly Keep
Setting aside a small box for genuine favorites, chosen occasionally rather than automatically, keeps a meaningful collection without it becoming overwhelming by the end of a single season. Involving your toddler in that occasional choice, once they’re old enough to express a preference, adds one more small moment of genuine decision making to the whole process.
Common Obstacles With Fall Crafts for Toddlers
A few specific situations come up often enough to address directly.
“My toddler just wants to eat the paint or materials.”
This is common and developmentally typical, not a sign anything’s wrong. Choosing edible-safe paint recipes, or simply supervising closely and redirecting calmly, both work depending on your specific child’s current stage.
“My toddler loses interest after two minutes.”
Two minutes of genuine, engaged exploration is a complete session at this age. There’s no requirement to extend it, and offering the same craft again another day often produces a longer session once the novelty settles and familiarity builds confidence.
“The finished piece looks like nothing recognizable.”
This is exactly the point of process art. The value was in the doing, not in producing a recognizable leaf or pumpkin, and that’s worth remembering when a well-meaning relative asks what it’s supposed to be.
“I don’t have time for cleanup after every craft.”
Choosing from the lower mess options in this guide, or doing crafts outside or on an easily wiped surface, reduces cleanup time significantly without giving up the toddler-led approach.
“My toddler wants to control the entire craft, including materials for a sibling.”
This is a common social skill still developing, not defiance. Offering each child their own separate materials, rather than a shared pile, often sidesteps this conflict entirely during the toddler years.
“I keep catching myself steering the outcome without meaning to.”
This is genuinely common, even for parents who fully believe in the process-over-product approach. Simply noticing it and stepping back, even mid-craft, is enough; there’s no need for a perfect track record from the start.
Adapting This to Every Family’s Situation
These fall crafts for toddlers are meant to flex, not to be followed exactly as written. The National Association for the Education of Young Children frames developmentally appropriate practice as responsive to the specific child in front of you, not a fixed script every family follows the same way.
Family and Developmental Variation
Multilingual families. Every craft above works in any language your family speaks at home. Naming colors, textures, or materials doesn’t require English specifically, and switching between languages mid-craft is completely natural.
Disability and developmental variation. Several crafts include an easier version specifically because grip strength, sensory preferences, and attention span vary widely among toddlers, not just by age. If your child has sensory sensitivities to certain textures, the drier options in this guide, like playdough stamping or acorn cap gluing, work well as lower sensory alternatives to the wetter paint crafts.
Different family structures and caregivers. Nothing here requires two adults or a specific relationship to the child. An older sibling, grandparent, or any consistent caregiver can lead any of these just as well, with the same core approach.
Budget, Access, and Schedule
Budget. Every craft on this list uses materials most families already have, plus fall items free for the collecting outside. None of these require special classroom supplies or printable packs.
Access to outdoor materials. If your family doesn’t have easy access to leaves, acorns, or pinecones, most of these crafts adapt with paper cutouts or store bought substitutes noted in each entry, so a lack of nearby nature doesn’t rule out the guide entirely.
Time and schedule. If you only have five minutes, the quicker setup crafts, like fall color mixing or playdough stamping, work with almost no preparation. If today isn’t a craft kind of day, that’s a completely normal parenting day, not a missed opportunity.
Working parents with limited free time. These crafts don’t need a dedicated weekend project slot. Many work just as well squeezed into a normal weekday afternoon, especially the lower prep options in this guide.
Small living spaces. Crafts that use a contained tray or box, like the rolling and splatter painting ideas, keep mess controlled even without a dedicated craft area, which matters for families without much extra space. A single reusable tray can serve as your family’s designated craft zone regardless of home size.
Frequently Asked Questions About Fall Crafts for Toddlers
Questions About Process and Repetition
My toddler wants to do the exact same craft every day. Is that okay? Yes, repetition is genuinely valuable at this age. A toddler repeating a favorite craft is often refining their own technique and exploring small variations, even if it looks identical to an adult’s eye.
Should I save every piece my toddler makes? Not necessarily. Keeping a rotating handful of favorites, and photographing the rest before recycling, honors the effort without requiring an ever-growing collection of paper.
Is it okay to do these crafts with a mixed age group of toddlers and preschoolers together? Many work well with small adjustments. Skip the crafts involving small natural items like acorns or seeds for the youngest toddler specifically, and let an older child take the lead on trickier steps like tearing or weaving.
How do I handle a relative who keeps trying to “help” my toddler make it look better? A gentle, direct note beforehand, explaining that the process matters more than the result in your family’s approach, often heads off well-meaning intervention before it starts.
Questions About Materials and Timing
Is it okay to reuse the same materials, like leaves or a pinecone, across several different crafts? Yes, this is a genuinely practical approach. A single pinecone can move from rolling painting to playdough stamping over the course of a week, cutting down on both cost and the need for constant fresh collecting.
My toddler refuses to touch certain textures, like wet paint or crumpled tissue paper. What should we try first? Start with a drier, lower sensory option like playdough stamping or acorn cap gluing. These can build comfort with hands-on materials before trying wetter, messier crafts later.
Should crafts happen at a specific time of day for the best results? Most families find toddlers engage better mid-morning or shortly after a nap, when energy is higher and frustration is lower. There’s no universal best time, though, and following your own child’s actual rhythm matters more than any general rule.
Your One Next Step
Pick one craft from the at-a-glance table above, gather just its materials, and let your toddler’s own hands decide what happens next, without stepping in to guide the outcome.
Whatever comes out the other side, however far from a recognizable leaf or pumpkin, is exactly the point of this whole approach.
Sources consulted: National Association for the Education of Young Children, Defining Developmentally Appropriate Practice; U.S. Consumer Product Safety Commission public guidance on choking hazards and small parts sizing for children under 4.