
It’s raining, or it’s ten degrees outside, or you simply live somewhere without a yard, and your toddler has already rearranged every throw pillow in the living room twice. You’re searching for indoor toddler activities because you need something that works in the actual square footage you have — not a backyard obstacle course or a big empty playroom you don’t own.
Here’s the direct answer: the best indoor toddler activities for a small space aren’t scaled-down versions of big-space play — they’re activities specifically chosen to work within a few square feet, using a table, a doorway, a corner, or a tray, so a small living room, an apartment, or a single bedroom is genuinely enough room. This guide organizes 20 real indoor toddler activities by setup time, mess level, and how much floor space they actually need, so you can pick one that fits your home and your Tuesday rather than one that assumes a mudroom and a fenced yard you don’t have.
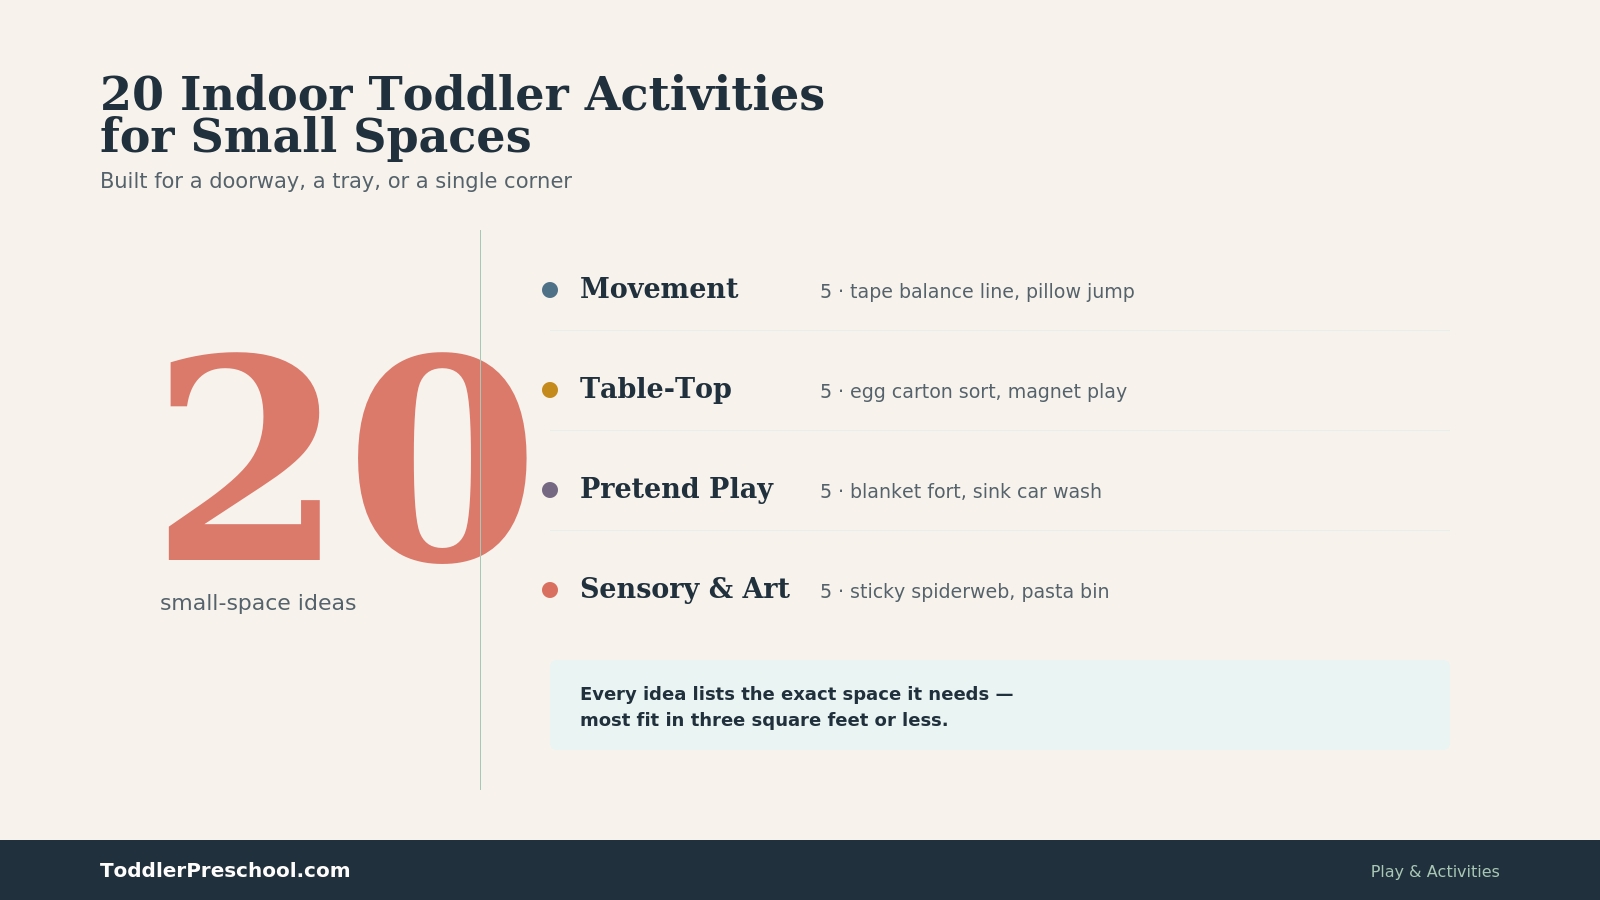
How to Use This List of Indoor Toddler Activities
Every activity below uses the same shorthand so you can scan quickly instead of rereading definitions 20 times:
- Best fit: a loose age range, not a deadline. Toddlers vary enormously in attention span, coordination, and interest, and a wider or narrower range than what’s listed is completely normal.
- Space needed: how much floor or table footprint the activity actually takes up — most of these indoor toddler activities fit in a 3-by-3-foot area or smaller, since that’s the reality of a small living room, an apartment corner, or a shared bedroom.
- Time: setup time, then typical active play time. Toddlers often engage with something for far less time than adults expect, and that’s fine.
- Mess: None (put it away and you’re done), Low (a damp paper towel handles it), or Medium (a few minutes with a broom, sponge, or wipe-down). Nothing on this list assumes you have a mudroom, a hose, or a yard to hide the mess in — every idea here is genuinely small-space and indoor-friendly.
- Supervision: how closely an adult needs to stay involved. “Arm’s reach” means within-touching-distance active supervision, which matters most for anything involving small pieces (see the safety section below).
- Skills it may support: phrased deliberately as “may,” never as a promise or a checklist item — see the note on this below.
- Easier version, Extension, Stopping point: a way to scale the same activity down, up, or end it early without it feeling like a failure.
A note on “skills it may support”: play doesn’t need to be justified by a developmental outcome to be worth doing, and a toddler doesn’t need to “achieve” anything from stacking egg carton pieces by color. Where we mention a skill an activity may touch on, it’s meant as a loose, honest connection — not a claim that this activity builds that skill, and definitely not a substitute for how your child is actually doing. If you have a real question about your child’s development, your pediatrician is the right person to ask, not an activity list.
A Quick Word on Safety and Supervision
A few of the indoor toddler activities below involve small pieces — beads, pasta, pom-poms — and general guidance from the U.S. Consumer Product Safety Commission is worth keeping in mind for any of them: children under 3 still explore objects with their mouths, and a rough rule of thumb is that anything small enough to fit through an empty toilet paper tube (about 1.25 inches across) is a choking risk and needs close, active supervision or should be skipped for a child who still mouths objects. Small spaces also mean furniture, doorframes, and hard floors are often closer than they’d be in a bigger room, so a quick look around for sharp corners or unstable furniture before an active movement activity is worth the extra minute. None of the activities below require an adult to hover anxiously, but a few genuinely need you within arm’s reach rather than in the next room, and those are labeled clearly.
All 20 Indoor Toddler Activities at a Glance
| Activity | Category | Best Fit | Space Needed | Mess |
|---|---|---|---|---|
| Painter’s Tape Balance Line | Movement | 18mo–3.5yr | A few feet of open floor | None |
| Pillow Jump Landing Zone | Movement | 2–3.5yr | One corner | None |
| Push-Toy Parking Garage | Movement | 18mo–3yr | Small floor area | None |
| Doorway Freeze Dance | Movement | 12mo–3.5yr | One doorway or clear spot | None |
| Laundry Basket Toss | Movement | 2–3.5yr | A few feet | None |
| Egg Carton Color Sort | Quiet / Table-Top | 2–3.5yr | Table or tray | Low |
| Water-Painting a Small Chalkboard | Quiet / Table-Top | 2–4yr | Table | Low |
| Fridge or Cookie-Sheet Magnet Play | Quiet / Table-Top | 18mo–3.5yr | Fridge front or small table | None |
| Pipe-Cleaner Bead Threading | Quiet / Table-Top | 2–3.5yr | Table | None |
| Busy Book Page | Quiet / Table-Top | 12mo–3yr | Lap or small table | None |
| Corner Blanket Fort | Pretend Play | 18mo–4yr | One corner | None |
| Behind-the-Chair Puppet Show | Pretend Play | 2–3.5yr | Behind one chair | None |
| Sink or Tub Car Wash | Pretend Play | 2–4yr | Bathroom sink or tub | Low |
| Bookshelf Grocery Store | Pretend Play | 2–4yr | One low shelf | Low |
| Stuffed Animal Circle Time | Pretend Play | 18mo–4yr | Small floor circle | None |
| Doorway Sticky Spiderweb | Sensory & Art | 18mo–3.5yr | One doorway | Low |
| Tray Pasta Sensory Bin | Sensory & Art | 2–3.5yr | Table or tray | Low |
| Contact-Paper Window Art | Sensory & Art | 18mo–3.5yr | One window | Low |
| Tissue Paper Mini Collage | Sensory & Art | 2–4yr | Table | Low |
| Flashlight Shadow Play | Sensory & Art | 18mo–4yr | Small dim corner | None |
Indoor Movement Activities for Toddlers in Small Spaces
A small living room can absolutely support real movement — these five indoor toddler activities are built around a few feet of floor, not a whole room.
1. Painter’s Tape Balance Line
Stick a strip of painter’s tape in a straight or gently curved line on the floor for your toddler to walk along, heel-to-toe or just carefully.
Best fit: 18 months–3.5 years · Space needed: a few feet of open floor · Time: 2 minutes setup, 5–10 minutes play · Mess: None · Supervision: Same room.
Materials & substitutions: Painter’s tape (won’t damage most flooring); a piece of string laid flat works in a pinch.
Steps: 1) Lay a simple line, straight or with one gentle curve. 2) Demonstrate walking along it. 3) Let your child try, offering a hand for balance if wanted.
Skills it may support: balance, focus, following a visual path.
Easier version: Make the line short and wide-feeling by walking alongside your child the whole way. Extension: Add a simple shape (a loop, a zigzag) once a straight line is easy. Stopping point: A handful of crossings is a complete activity — peel up the tape whenever you’re done.
Visual direction: Overhead shot of a taped line on a wood or tile floor, small feet mid-step along it, clean minimal composition, natural light.
2. Pillow Jump Landing Zone
A stack of couch cushions or floor pillows in one corner becomes a safe jumping-and-landing spot.
Best fit: 2–3.5 years · Space needed: one corner of a room · Time: 2 minutes setup, 10–15 minutes play · Mess: None · Supervision: Arm’s reach, since jumping and landing safely is still developing at this age.
Materials & substitutions: Couch cushions, floor pillows, or a folded comforter.
Steps: 1) Stack cushions in a corner, away from furniture edges. 2) Let your child climb, jump, and land repeatedly. 3) Rebuild the pile as it flattens or scatters.
Skills it may support: gross motor confidence, controlled jumping, understanding a safe landing zone.
Easier version: Keep the pile low and let your child simply climb and flop rather than jump. Extension: Add a small “running start” of two steps before the jump for a more confident toddler. Stopping point: When the pillows are flat or your child moves on, that’s the end — no need to keep restacking indefinitely.
Visual direction: Wide shot of a toddler mid-jump onto a pillow pile in a living room corner, genuine motion blur okay, bright indoor light.
3. Push-Toy Parking Garage
Painter’s tape roads on the floor turn a small area into a “parking garage” or town for push cars or ride-on toys.
Best fit: 18 months–3 years · Space needed: a small floor area, even a single rug · Time: 5 minutes setup, 10–20 minutes play · Mess: None · Supervision: Same room.
Materials & substitutions: Painter’s tape for roads, small boxes as “buildings” or a “garage,” toy cars or a push-toy your child already has.
Steps: 1) Tape a simple road loop or a few lines on the floor. 2) Add a box “garage” or “car wash” at one end. 3) Let your child drive, park, and narrate freely.
Skills it may support: imaginative play, following a visual path, fine motor control while pushing/steering.
Easier version: Skip the tape entirely and just designate a box as the “garage” for free-form driving. Extension: Add a second level or a “gas station” stop along the route. Stopping point: This one can stay taped down for days if space allows — otherwise, peeling up the tape is a clean, simple end.
Visual direction: Overhead flat-lay of taped roads with toy cars mid-route, small hand pushing a car, graphic and colorful for a Pinterest-style shot.
4. Doorway Freeze Dance
Put on music in any small clear space — a doorway, a rug, a few feet of kitchen floor — and dance together, freezing when the music stops.
Best fit: 12 months–3.5 years · Space needed: one doorway or small clear spot · Time: no setup, 5–15 minutes · Mess: None · Supervision: Same room.
Materials & substitutions: Any music source — a phone speaker or a hummed tune both work.
Steps: 1) Start music and move together in place. 2) Stop the music and freeze. 3) Repeat, exaggerating the freeze for laughs.
Skills it may support: listening for a stop cue, whole-body movement in a contained space, anticipation.
Easier version: Skip the “freeze” rule and just dance together. Extension: Add different movement styles between freezes (tiptoe, stomp, spin in place). Stopping point: One or two songs is a complete session.
5. Laundry Basket Toss
Toss soft balls, rolled-up socks, or bean bags into an empty laundry basket from a short distance.
Best fit: 2–3.5 years · Space needed: a few feet · Time: 1 minute setup, 5–10 minutes play · Mess: None · Supervision: Same room.
Materials & substitutions: An empty laundry basket, soft balls or rolled-up sock “balls,” bean bags if you have them.
Steps: 1) Set the basket a short, achievable distance away. 2) Toss items in together. 3) Move the basket closer or farther to adjust difficulty.
Skills it may support: hand-eye coordination, gross motor throwing, simple counting if you count successful tosses together.
Easier version: Move the basket very close, almost touching, for an early success rate. Extension: Add a “point value” to different distances for an older toddler. Stopping point: When the basket empties out for the last time or interest fades, stop — no need to keep refilling it.
Visual direction: Action shot of a small hand mid-toss, a soft ball in flight toward a laundry basket, bright indoor light, genuine motion captured.
Quiet and Table-Top Indoor Toddler Activities
Not every day calls for movement — these five indoor toddler activities work at a table or on a tray and fit even the smallest apartment.
6. Egg Carton Color Sort
Color a few egg carton cups with marker and sort colored pom-poms, buttons, or small blocks into the matching cup.
Best fit: 2–3.5 years · Space needed: a table or tray · Time: 2 minutes setup, 5–10 minutes play · Mess: Low · Supervision: Arm’s reach if using pom-poms or small items, which are a choking risk for a child who still mouths objects.
Materials & substitutions: An empty egg carton, marker, and sortable items in a few colors — pom-poms, buttons (supervise closely), or torn paper scraps.
Steps: 1) Color 3–4 cups different colors. 2) Offer a small bowl of mixed items. 3) Sort together, naming each color aloud.
Skills it may support: color matching, fine motor pincer grasp, early sorting logic.
Easier version: Use just two colors instead of four. Extension: Add more colors or introduce small tongs for an extra fine motor challenge. Stopping point: However many cups get filled is enough — no need to finish the whole carton.
Visual direction: Overhead close-up of a colored egg carton with pom-poms being sorted in, small hand mid-sort, bright clean background.
7. Water-Painting a Small Chalkboard
“Paint” a small chalkboard or dry-erase board with plain water on a paintbrush — it darkens like paint, then disappears as it dries.
Best fit: 2–4 years · Space needed: a table · Time: 1 minute setup, 10–15 minutes play · Mess: Low (just water) · Supervision: Same room.
Materials & substitutions: A small chalkboard, dry-erase board, or even a dark-colored placemat; a paintbrush and a small cup of water.
Steps: 1) Set out the board, brush, and water cup. 2) Let your child “paint” freely. 3) Watch together as earlier strokes fade and dry.
Skills it may support: brush control, cause-and-effect observation, a genuinely mess-free way to practice “painting” strokes.
Easier version: Use a bigger brush and a bigger board for less precision required. Extension: Try painting letters or shapes once your child has basic brush control. Stopping point: When the water cup is empty or the board’s been “painted” enough times, stop — nothing to clean beyond wiping the table.
8. Fridge or Cookie-Sheet Magnet Play
Magnetic letters, shapes, or numbers stick to the fridge door or a cookie sheet set on a table.
Best fit: 18 months–3.5 years · Space needed: the fridge front or a small table with a cookie sheet · Time: no setup, 5–15 minutes · Mess: None · Supervision: Arm’s reach if magnets are small enough to be a choking risk for a child who still mouths objects.
Materials & substitutions: Magnetic letters, numbers, or shapes; a cookie sheet turns any table into a magnet-friendly surface if fridge access is limited.
Steps: 1) Offer a handful of magnets. 2) Name letters, shapes, or colors as your child places them. 3) Rearrange and repeat.
Skills it may support: letter or shape recognition, fine motor placement, open-ended arranging.
Easier version: Offer just 4–5 magnets instead of a full set. Extension: Try spelling your child’s name together with letter magnets. Stopping point: When magnets scatter or interest fades, sweep them back into a container — no formal end needed.
Visual direction: Close-up of a fridge door covered in colorful magnetic letters, small hand placing one, bright kitchen lighting.
9. Pipe-Cleaner Bead Threading
Thread large beads, cut straws, or dry cereal onto a bent pipe cleaner.
Best fit: 2–3.5 years · Space needed: a table · Time: 2 minutes setup, 10–15 minutes play · Mess: None · Supervision: Arm’s reach — beads and cereal are a genuine choking risk for a child who still mouths objects, so stay close throughout.
Materials & substitutions: A pipe cleaner with one end bent into a loop (so beads don’t slide off), and large beads, cut drinking straws, or round cereal to thread.
Steps: 1) Bend one end of the pipe cleaner into a stopper loop. 2) Offer the threading materials. 3) Thread together, then bend the other end to make a bracelet or wand.
Skills it may support: fine motor precision, hand-eye coordination, sustained focus on a repetitive task.
Easier version: Use bigger beads or straw pieces, spaced apart in a bowl for easy grabbing. Extension: Sort by color while threading, or make a patterned sequence. Stopping point: One finished pipe cleaner is a complete project — wear it as a bracelet and call it done.
10. Busy Book Page
A single page of a “busy book” (zippers, buttons, buckles, laces sewn onto fabric) or even one real zipper/buckle from an old jacket gives focused, repeatable practice.
Best fit: 12 months–3 years · Space needed: a lap or small table · Time: no setup, 5–10 minutes · Mess: None · Supervision: Same room.
Materials & substitutions: A store-bought busy book page, or an old jacket/bag with a zipper and buckle your child can practice on directly.
Steps: 1) Offer the page or item. 2) Let your child explore the fastener independently. 3) Demonstrate once if they get stuck, then step back.
Skills it may support: fine motor problem-solving, the exact self-help skills used for getting dressed, sustained independent focus.
Easier version: Start with the largest, easiest fastener (a big zipper) rather than a small button. Extension: Time how fast the fastener can be worked once it’s familiar. Stopping point: A few successful tries is enough — this is a great one to leave out for your child to return to on their own.
Pretend Play Activities for Small Spaces
Pretend play doesn’t need a playroom — these five indoor toddler activities use a corner, a chair, or even the bathroom sink.
11. Corner Blanket Fort
A blanket draped over one or two chairs pushed into a corner makes a genuine fort using furniture you already have.
Best fit: 18 months–4 years · Space needed: one corner · Time: 5 minutes setup, 15–30 minutes play · Mess: None · Supervision: Same room; make sure the structure is stable and won’t collapse onto your child.
Materials & substitutions: One or two chairs, a large blanket or sheet, a few clips or heavy books to hold it in place.
Steps: 1) Drape the blanket over the chairs, anchoring corners. 2) Add a flashlight or a few stuffed animals inside. 3) Follow your child’s lead on what the fort “is” that day.
Skills it may support: imaginative and symbolic play, spatial awareness, independent or side-by-side play.
Easier version: Skip the chairs and just drape a blanket over a coffee table for a lower, simpler den. Extension: Add a “password” or a specific pretend purpose (a cave, a spaceship) that changes daily. Stopping point: This one can stay up for days if space allows — no need to take it down after one use.
Visual direction: Warm, softly lit shot of a small blanket fort in a living room corner, a child peeking out from inside, cozy and inviting mood.
12. Behind-the-Chair Puppet Show
A simple sock or paper-bag puppet performs from behind the back of a couch or armchair.
Best fit: 2–3.5 years · Space needed: behind one chair · Time: 5 minutes setup, 10–15 minutes play · Mess: None · Supervision: Same room.
Materials & substitutions: A sock or paper bag with a drawn-on face as a puppet; any chair or couch back as the “stage.”
Steps: 1) Make or grab a simple puppet. 2) Crouch behind the chair back. 3) Perform a short scene or just a silly conversation for a small audience.
Skills it may support: verbal expression, narrative sequencing, comfort performing through a character.
Easier version: Skip the “stage” and just do puppet voices together, no hiding required. Extension: Make a second puppet for a sibling or parent to join the show. Stopping point: One short show is a complete performance.
Visual direction: Candid shot from the front, a sock or paper-bag puppet peeking over the back of a couch, child’s hand visible, playful expression.
13. Sink or Tub Car Wash
Toy cars get “washed” with a soapy washcloth in the bathroom sink or an inch of water in the tub.
Best fit: 2–4 years · Space needed: a bathroom sink or tub · Time: 2 minutes setup, 15–20 minutes play · Mess: Low (water stays contained in the sink or tub) · Supervision: Arm’s reach — any water play near a sink or tub needs active, close supervision.
Materials & substitutions: A few toy cars, a washcloth, a small squirt of dish soap, a towel for drying “customers.”
Steps: 1) Fill the sink or a shallow tub with an inch or two of water. 2) Add a small amount of soap. 3) Wash, rinse, and dry each car, lining up the next “customer.”
Skills it may support: sequencing (wash, rinse, dry), fine motor scrubbing, water play in a genuinely contained space.
Easier version: Skip soap and just do water play with the cars. Extension: Set up a “drive-through” order with a specific sequence of steps to follow. Stopping point: When all the cars are washed, the car wash closes for the day.
Visual direction: Close-up of small hands washing a toy car in a sink with suds, bright bathroom lighting, genuine playful mess visible.
14. Bookshelf Grocery Store
A single low shelf becomes a pretend grocery store stocked with empty food boxes and containers.
Best fit: 2–4 years · Space needed: one low shelf · Time: 5 minutes setup, 15–20 minutes play · Mess: Low (boxes scatter, quick to regather) · Supervision: Same room; avoid containers with sharp edges.
Materials & substitutions: Empty, clean food boxes and containers, a small basket or bag, a shelf or even a single dresser drawer as the “store.”
Steps: 1) Line up 5–6 empty containers on the shelf. 2) Give your child a basket to “shop” with. 3) “Check out” at a nearby small table.
Skills it may support: categorization, imaginative play, real-world sequence understanding.
Easier version: Use just 3–4 boxes instead of a full shelf. Extension: Add a simple list (“find something red”) or take turns as shopper and cashier. Stopping point: One shopping trip is a complete round — boxes go back in the recycling bin or a bin for next time.
15. Stuffed Animal Circle Time
Seat a few stuffed animals in a small circle on the floor for a pretend “circle time” with a song or a story.
Best fit: 18 months–4 years · Space needed: a small floor circle, a few feet across · Time: no setup, 10–15 minutes · Mess: None · Supervision: Same room.
Materials & substitutions: A few stuffed animals or dolls your child already has.
Steps: 1) Seat the “students” in a circle. 2) Lead a short song or read a book to the group. 3) Let your child take over as “teacher” for a turn.
Skills it may support: imaginative role-play, recalling familiar songs or routines, comfort leading a group (even a pretend one).
Easier version: Use just one or two stuffed animals instead of a full class. Extension: Add a pretend “snack time” or “nap time” after circle time, mirroring your child’s actual day. Stopping point: One song or one short book is a complete session.
Sensory and Art Indoor Toddler Activities
Sensory and art play can feel like the messiest category, but these five indoor toddler activities are specifically chosen to stay contained to a tray, a window, or a doorway.
16. Doorway Sticky Spiderweb
Tape a sheet of clear contact paper across a doorway, sticky side out, for your toddler to stick pom-poms or paper scraps onto.
Best fit: 18 months–3.5 years · Space needed: one doorway · Time: 5 minutes setup, 10–15 minutes play · Mess: Low · Supervision: Arm’s reach if using pom-poms or small paper pieces, a choking risk for a child who still mouths objects.
Materials & substitutions: Clear contact paper, painter’s tape, and pom-poms, torn paper, or tissue paper scraps.
Steps: 1) Tape contact paper sticky-side-out across a doorway at your child’s height. 2) Offer a small bowl of materials. 3) Let your child press pieces on and peel them off freely.
Skills it may support: fine motor pincer grasp, cause-and-effect, color and texture exploration — and it uses vertical space instead of floor space, which matters in a small room.
Easier version: Use just one type of material instead of a mixed bin. Extension: Sort materials by color into small cups before sticking. Stopping point: When the sheet is full or interest fades, take it down — no ceremony needed.
Visual direction: Close-up of a colorful pom-pom being pressed onto a sticky sheet stretched across a doorway, light coming through, graphic and bright.
17. Tray Pasta Sensory Bin
Dry pasta shapes in a shallow tray make a low-mess sensory bin that stays contained to a small table.
Best fit: 2–3.5 years · Space needed: a table or tray · Time: 3 minutes setup, 10–20 minutes play · Mess: Low (contained to the tray, though some pasta will end up on the floor) · Supervision: Arm’s reach — dry pasta is a choking risk for a child who still mouths objects.
Materials & substitutions: A shallow tray or baking sheet, a few cups of dry pasta shapes, small cups or spoons for scooping.
Steps: 1) Pour pasta into the tray. 2) Offer cups and spoons for scooping and pouring. 3) Let your child explore freely — pouring, sorting, “cooking.”
Skills it may support: sensory exploration, fine motor scooping and pouring, imaginative “cooking” play.
Easier version: Use one pasta shape instead of a mixed variety, and a smaller tray. Extension: Add small toy animals to “feed” or hide in the pasta. Stopping point: When attention shifts, pour the pasta back into a container for next time — it’s reusable.
Visual direction: Overhead flat-lay of a tray filled with dry pasta shapes, small hand scooping with a cup, warm natural light, satisfying texture visible.
18. Contact-Paper Window Art
Clear contact paper taped to a window, sticky side facing the room, lets your toddler build colorful window art with tissue paper.
Best fit: 18 months–3.5 years · Space needed: one window · Time: 5 minutes setup, 10–20 minutes play · Mess: Low · Supervision: Same room.
Materials & substitutions: Clear contact paper, painter’s tape, torn or cut tissue paper in a few colors.
Steps: 1) Tape contact paper sticky-side-in to a low window. 2) Offer tissue paper pieces. 3) Let your child press pieces on to build a colorful scene the light shines through.
Skills it may support: fine motor placement, color mixing (overlapping tissue paper creates new colors where light passes through), a project that uses window space rather than floor space.
Easier version: Use fewer, larger tissue paper pieces. Extension: Try overlapping two colors and naming the new color that appears. Stopping point: When the sheet is full, leave it up as a keepsake for as long as you like — no need to take it down right away.
Visual direction: Backlit shot from inside the room, sunlight streaming through colorful tissue paper on the window, jewel-toned colors glowing, child silhouetted nearby.
19. Tissue Paper Mini Collage
Glue small tissue paper squares onto a small piece of paper or cardstock for a compact, table-top art project.
Best fit: 2–4 years · Space needed: a table · Time: 3 minutes setup, 10–15 minutes play · Mess: Low · Supervision: Same room.
Materials & substitutions: A glue stick (easier and less messy than liquid glue for this age), small pre-cut tissue paper squares, a small piece of paper or cardstock.
Steps: 1) Offer the paper, glue stick, and a small bowl of tissue squares. 2) Demonstrate one placement. 3) Let your child build the collage freely.
Skills it may support: fine motor pincer grasp, color exploration, an open-ended, no-wrong-answer creative task.
Easier version: Pre-glue a few pieces together to model the idea, then hand over the glue stick for the rest. Extension: Cut the paper into a simple shape (a heart, a circle) to collage within. Stopping point: A full page is a natural stopping point — let it dry flat and display or toss it without ceremony.
Visual direction: Overhead close-up of a small collage in progress, tissue paper squares in bright colors, small hand placing one, clean table surface.
20. Flashlight Shadow Play
A flashlight in a dim corner or under a blanket tent turns ordinary hand and toy shadows into a simple, calm game.
Best fit: 18 months–4 years · Space needed: a small dim corner · Time: no setup, 10–15 minutes · Mess: None · Supervision: Same room.
Materials & substitutions: Any flashlight or phone flashlight; a blanket over a table makes a nice dim “theater” if you want one.
Steps: 1) Dim the room or head into a naturally darker corner. 2) Shine the flashlight on the wall and make hand or toy shadows. 3) Take turns guessing what each shadow is.
Skills it may support: cause-and-effect (light and shadow), a calming low-stimulation activity for winding down, simple guessing-game turn-taking.
Easier version: Skip the guessing game and just enjoy making shapes together. Extension: Use toy animals to make more recognizable shadow shapes. Stopping point: This one works well as a bedtime wind-down — ending when the flashlight goes off for the night is a natural close.
Visual direction: Low-light, cozy shot of a flashlight beam on a wall with a hand shadow, child’s silhouette in frame, warm and calm mood.
Adapting This to Every Family’s Situation
These indoor toddler activities are meant to flex, not to be followed exactly as written. The National Association for the Education of Young Children frames developmentally appropriate practice as play-based learning that’s also culturally, linguistically, and individually responsive to the specific child in front of you — not a fixed script every family runs the same way, and that applies directly here, in a small apartment as much as a large house.
Multilingual families. Every activity above works in any language your family speaks at home — none of these indoor toddler activities require English specifically, and switching between languages during play is a strength, not something to correct.
Disability and developmental variation. Several activities include an “easier version” specifically because attention span, motor skills, and sensory preferences vary widely among toddlers for all kinds of reasons, not just age. If your child uses mobility equipment or has sensory sensitivities, most of these ideas can be adapted with input from a therapist working with your family, who is a better source for individualized modifications than any general list.
Different family structures and caregivers. Nothing here requires two adults, a yard, or even one dedicated adult at a time — an older sibling, grandparent, or any consistent caregiver in a small apartment can lead any of these just as well as in a larger home.
Budget. Every activity on this list uses materials most households already have, or substitutes that cost nothing — egg cartons, tape, pillows, and old jackets do real work here. None of this requires a purchase or extra square footage to attempt tonight.
Time, schedule, and living situation. If you only have five minutes, pick something from the “no setup” column in the at-a-glance table above. If your family lives in a small apartment, shares space with roommates or extended family, or simply doesn’t have a dedicated play area, every single idea in this guide was chosen specifically because it doesn’t require one.
Frequently Asked Questions About Indoor Toddler Activities
My apartment has thin walls — which of these indoor toddler activities are quietest for noise-sensitive neighbors? The table-top and sensory options (egg carton sorting, window art, the tissue paper collage, pipe-cleaner threading) are naturally quiet, while the movement activities like the pillow jump zone and freeze dance involve more noise and impact — save those for daytime hours if noise is a real concern in your building.
Do I need a dedicated playroom or play corner for any of this to work? No — every activity on this list was specifically chosen to work in a shared living space, using furniture, a table, or a doorway you already have, rather than a room set aside just for play. A dedicated space is a nice-to-have, not a requirement for any indoor toddler activity here.
My toddler loses interest after two minutes — is that normal for indoor play specifically? Very short attention spans are typical at this age regardless of indoor or outdoor setting, and it’s common for a “10-15 minute” activity to actually run a few minutes in real life. That’s not a sign anything is wrong with the activity or your child — repeating a short activity often works better than trying to stretch one out.
Your One Next Step
Look at the “At a Glance” table above, pick one of these indoor toddler activities with “no setup” listed, and try it in the next 20 minutes — before you have time to overthink it.
Sources consulted: National Association for the Education of Young Children — Defining Developmentally Appropriate Practice; U.S. Consumer Product Safety Commission — public guidance on choking hazards and small-parts sizing for children under 3.